Intercoolers
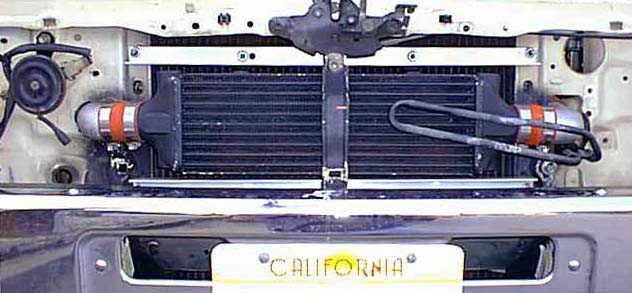
With the grille off it's a little ugly, but it does the job.
Overview: Intercoolers and the 22R-TE
An intercooler, for those who don't know, is essentially a radiator designed to cool the hot "boosted" air coming out of the turbocharger. Because compressing air raises its temperature (generally around 150 degrees F above ambient air temperature for every 7 psi of boost), intercooling goes hand in hand with turbocharging . Since the stock boost in the 22R-TE is about 7 psi, this means that the temperature of the stock system's output (on a 70 degree spring day) would be something like 220 degrees F. Raise the boost to 14 psi, and you're looking at 370 degrees F when the air reaches the injectors; not only does this heat prevent your engine from reaching its performance potential, the hot air expands the fuel mixture, leading to detonation and poor mileage.
Enter the intercooler. Intercoolers can create dramatic results on engines that run a lot of boost, because this excess heat has a place to dissipate. But how much of a difference can an intercooler make on a stock 22R-TE?
From my experience, I'd have to say that an intercooler *by itself* does not yield a significant increase in performance on a 22R-TE running stock boost. This is mostly because the stock boost is so low, but it's also because an intercooler introduces some additional turbo lag, and the stock setup already has enough of that courtesy of its design.
Before the addition of the intercooler, I was seeing 7.5 psi of boost at the throttle plate (where my boost gauge takes its reading from). This is on the high end of the stock boost spectrum. After adding an intercooler, this figure dropped to 6 psi. Performance remained about the same: whatever gains I saw from cooling the intake charge were likely mitigated by the (comparatively significant) drop in boost pressure. In other words, it was basically a wash. An intercooler alone was not a big power maker on my ride.
[Note: Brian W. has pointed out to me that this pressure drop is also due to the cooling effects of the intercooler: cooler air is denser, so simple physics would indicate that for a given boost, cooler air will always take up less volume than warmer air; hence the pressre drop I saw. Thanks, Brian...for making me realize anew why I got a C in Physics :-)]
When I increased the boost, the whole picture changed.
Running 13 psi of boost, I saw *SIGNIFICANT* gains in the vehicle's performance: It screamed! It put a huge smile on my face. It said, "This is why people turbocharge things in the first place." With the added boost, the installation of the intercooler made more sense, because there was now a lot of excess heat to control, and enough boost to compensate for the loss in pressure caused by the presence of the intercooler in the intake stream.
So keep this in mind as you read through the steps I've outlined below: An intercooler is just one piece of solving the 22R-TE puzzle. As an isolated move, it doesn't make much additional power, but it's a great addition when it's combined with more boost.
Installing an intercooler in a 22R-TE pickup (or 4Runner)
Parts needed:
- An intercooler (duh!)
- Tubing (I would recommend stainless steel for this, though aluminized steel could be used)
- Silicone interconnect hoses, to join together pieces of tubing
- Hose clamps
- An adapter flange to connect to outlet of stock turbo housing.
- A length of angle-bracket type aluminum to mount the intercooler to chassis.
I'd love to give everyone a generic set of instructions, but that's not really possible, because no one currently makes an intercooler kit for this engine/chassis. Consequently, unless you buy a new core from Spearco, you are probably going to be piecing something together from a variety of different used parts. Your installation is going to be affected by the size/shape of the intercooler core you choose and the location you decide to mount it; no two installations are going to be the same.
Spearco Performance Products (818-901-7851) is by far the leading manufacturer of aftermarket intercoolers in the U.S., and perhaps the world. If you want to purchase a new intercooler core, you should give them a call and order a catalog. Their new intercooler cores run $400 - $600. You will also need two manifolds (as the end caps containing the hose connections are called), and these can run upwards of $100 for the pair. These manifolds come in a wide variety of shapes and configurations, so having one of their catalogs is pretty much mandatory if you're going to use new parts.
Used intercoolers are available, especially from junkyards specializing in late model American cars (there were a number of factory intercooled Fords and Chryslers). Prices for these run about $100 - $150.
In my case, I purchased a used intercooler from someone on the Toyota mail list. This piece was a Spearco "rod and tube" core, and measures approximately 19" X 6" X 3". The manifolds are center exit, straight pipes, and it fits perfectly behind the grille, in front of the radiator. This was the location I wanted to use, so the intercooler would get the maximum cooling benefit at freeway speeds. If you have A/C (I don't) you'll need to find a different location, as there's not enough room here for both the A/C condenser and an intercooler.
(As an aside, Spearco used to make an intercooler kit for 22R-TE trucks and 4Runners. They stopped producing it due to lack of demand, which is understandable but a shame. It mounted the intercooler core entirely within the engine compartment, above the passenger-side shock absorber. It sort of tucked in next to the intake manifold. Since this area has almost no air flowing past it, the kit also included a small "squirrel cage" fan to supply cooling, which sounds pretty sketchy to me. But the outstanding feature of their kit was that it had a CARB EO number, making it smog legal. I would assume that any kit pieced together from miscellaneous parts (like mine) is going to have to come back out at inspection time.)
So, having acquired an intercooler, the next challenge was gathering up the tubing and the adapter to plumb the thing. There are basically two ways of doing this: take your intercooler to a good muffler shop and say, "hook it up for me," or come up with the parts and do it yourself. This wouldn't be much of an article if I had done the former :-).
Enter the Surplus House
It was time to begin gathering some parts. The stock system uses a funky pipe that is 2 1/16" OD, and snakes around the top of the engine before joining the turbo housing at a much smaller mounting flange (1 5/8" ID or so). I wanted to come up with a suitable flange to use, something that could be bolted to the stock turbo but later changed (or removed) if I switched to a bigger-than-stock turbo. I also wanted to plumb the intercooler with stainless steel tubing.
I saw some ads for drawn on mandrel (DOM) stainless steel tubing in Turbo and Hi-Tech Performance magazine, so I made a few phone calls and discovered that new tubing was outrageously expensive ($75 for a U-shaped, 18" piece). It would have cost me $200 for the pieces I needed; I wanted to see if I could find something cheaper.
A friend mentioned that 2" stainless tubing was a pretty standard component in both food preparation and high tech manufacturing. Since I live in the Bay Area and work in Silicon Valley, I decided to check out some local surplus houses and see if someone else's cast off would work for me.
I hit the jackpot when I found Triangle Machine and Surplus on Commercial Court in San Jose, a Mecca for used parts, tools and raw metal. They had over half an aisle of used stainless tubing, including many pieces of 2" OD. I figured I would need two sweeping 90 degree bends and a couple of straight pieces, so for $75 I purchased over five linear feet of beautifully TIG welded, DOM stainless tubing. I also found a stainless flange that I could have machined to make the mounting flange I needed. For hard parts, I was set.
I also needed some miscellaneous silicone hose connectors and stainless steel hose clamps, as well as two tight 90 degree elbows to sneak the tubing by the radiator. I got these parts from Spearco. Just so you're prepared, these little odds and ends are pricey: the orange silicone connecting hose (2" OD) is $8 per 2.5" segment. I needed six segments. The appropriate stainless steel hose clamps (special, longer ends, so they don't cut into the silicone hose) were also steep, at $2 each. I needed 12 of these. You may be decide that you can get by with cheaper parts for these applications.
The Mounting Flange
In retrospect, I probably could have come up with a cheaper way to get the flange I wanted, but I'm very pleased with the functionality of what I came up with, so I can't really complain.
The stock turbo housing has a two bolt flange on the output side of the turbo. These bolts measure 2 7/8" center to center, with the turbo outlet hole that resides between them measuring a little over 1 5/8" in diameter. The pipe that directs pressurized air from the turbo into the intake plenum bolts to this flange. The new intercooler piping I was installing was also going to have to bolt to this flange.
If you are going to do this yourself, and plan on keeping the stock turbo, I would recommend having a machine or fabrication shop manufacture a flange for you and TIG weld some stainless tubing to the end of it. This would cost you less than $100 (including all materials) and give you a clean, finished piece.
I ended up adapting a stainless mounting flange I found at the surplus house. I probably saved $50, but it took a some serious machine work.
Whatever you choose, you would be wise to avoid cutting up the stock intake pipe, as I'm sure it would cost a small fortune to replace. (That pipe *must* be a $300 piece from the Toyota parts bin...)
Here's a (so-so) picture of the mounting flange I came up with, as it's mounted:
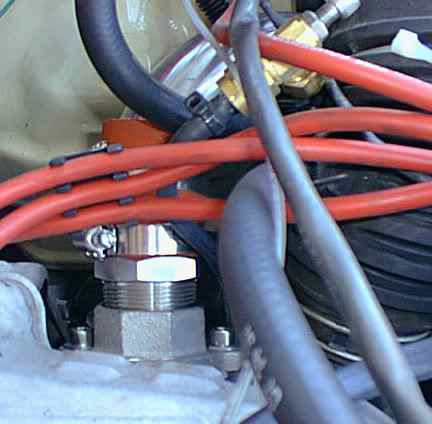
Obscured by wires and hoses, here's a top view of the intercooler tubing to turbo outlet flange
Elbows and Tubing
The system I ended up plumbing has four right angle bends (five if you include the rubber piece that attaches to the front of the throttle body). It was the most direct setup I could implement. It looks like this:
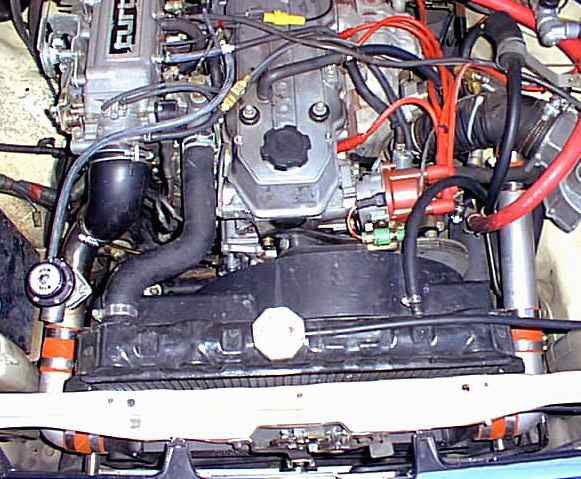
Overview of entire intercooler system.
You can see that it's pretty straight (and pretty straight forward). The tubing I bought from the surplus house was cut with a rigid tubing cutter and a hacksaw. The two narrow 90 degree elbows on either side of the intercooler core (the pieces that pass on either side of the radiator) were the cast aluminum elbows I purchased from Spearco (P/N #1-997, $36 each). The windshield washer reservoir had to be moved 2" to the left, but otherwise the side to side clearance was perfect.
[Note (4/16/99): Another excellent source for silicone intercooler hose is Baker Precision - http://www.bakerprecision.com/silicone.htm . They have a large selection of els, bump hoses, and transition pieces.
Performance Techniques ( http://www.turbonetics.com ) also has a selection of these pieces available. Between Baker Precision and Performance Techniques you should be able to find what you're looking for.]
Once I had all of the pieces, the actual installation took about four hours. A good bit of that time was spent relocating hoses. (The right side of the engine is very crowded, and the combination of power steering hose and turbo intake tubing makes routing the intercooler piping akin to a game of chess.)
Here a shot of the right (exhaust) side of the engine. Through the tangle of hoses and wires, you can see the intercooler piping and flange setup:
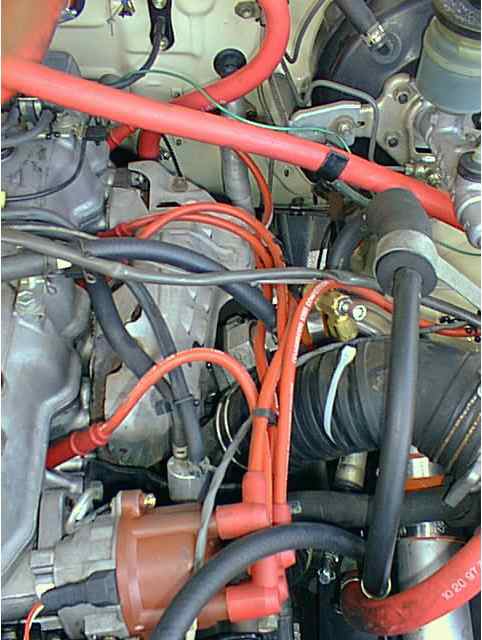
What a mess! The small brass widget in the center of the picture is a manual boost controller
Here's a close-up of the left side of the intercooler:
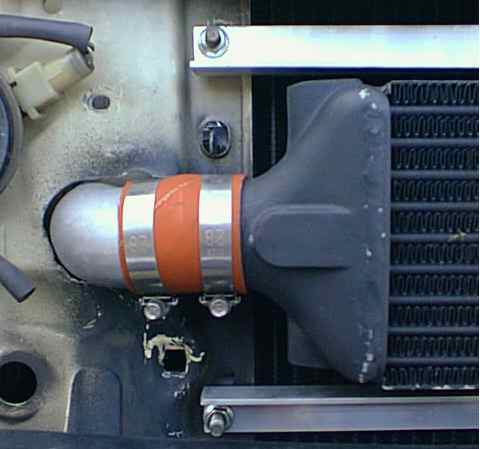
Left side intercooler, detail (right side looks about the same)
The mounting brackets were two pieces of 1" angled aluminum. I used the mounting bolts for the radiator, and simply replaced them with longer bolts. When I pull this off to paint it, I'll reverse these bolts, so the radiator will be removable again independent of the intercooler..
Here's a top view of the intercooler, as it resides behind the grille. It tucks in there pretty nicely:
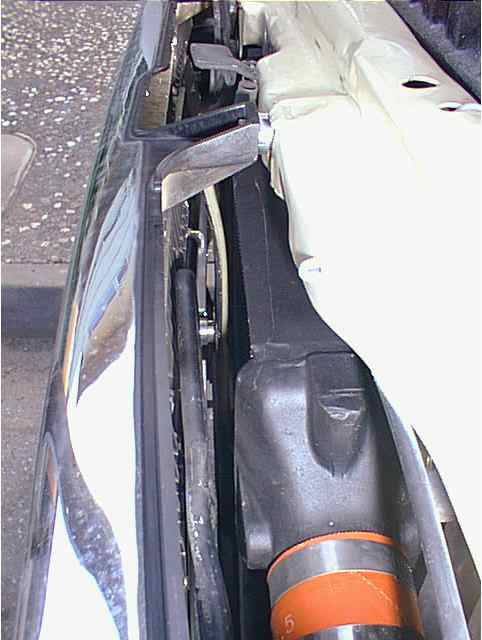
A side long look at the intercooler behind the grille.
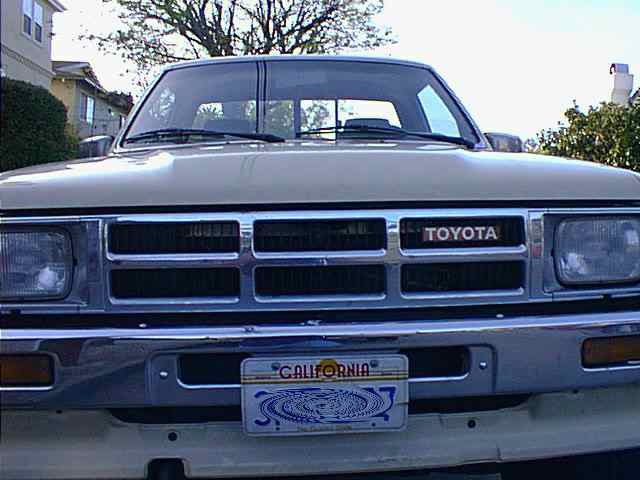
With the grille back on, you can barely tell it's there. If I had taken the time to paint the brackets initially, it would be invisible.